
It’s almost Thanksgiving in a little over a week. Which is sooo crazy!!! Like where did this year go?!?! But then I ask myself that every year so it’s ok. Anyways, beforeI start sharing all my Christmas DIYs and decor , thought I’d make one more easy DIY for fall. This is great for you if you’re hosting family and friends at your place or just want to get in the spirit for this great holiday. It’s easy and hope you try it out. I just made it for my dorm room and loved how it turned out. It was actually my first time making my own wreath successfully and it was soo easy, just needed the right materials and a little time.
So for the supplies, you’re gonna need a wreath form, burlap, mod podge, scissors and leaves. Just incase you don’t know, mod podge is basically liquid craft glue that dries clear! So it’s basically amazing. You can get these supplies from your local craft store or even dollar store for less than $10! (Talk about a great deal)

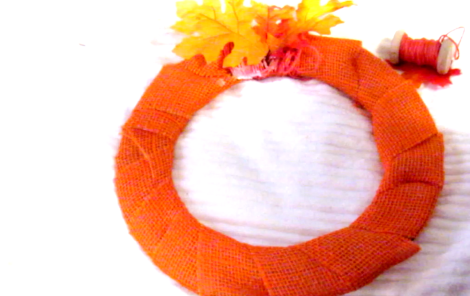
Once you have all your supplies ready, start unrolling your burlap and wrap it around the wreath form until the whole wreath form is covered up and no wire sis showing. And don’t worry about it unraveling as it’s most likely not gonna happen. But just incase, you can always put some hot glue to the ends. When you’re done with that, it’s time for the special touches with the leaves.
To add that fall touch, put some mod podge in the middle and edges of the middle of the wreath. Then immediately stick the leaves to the wreath and let the mod podge dry for some minutes. Once it’s dry, it’s ready to hang on your door or anywhere inside. I decided to hang mine in my room and not on a door.
Hope you liked this quick and simple Fall DIY that’s perfect for thanksgiving. Have a great Thanksgiving by the way.

So cute ❤ D.I.Y.s are some of my favorite things to do.
LikeLiked by 1 person
So glad you liked it!! They’re mine too!
LikeLiked by 1 person